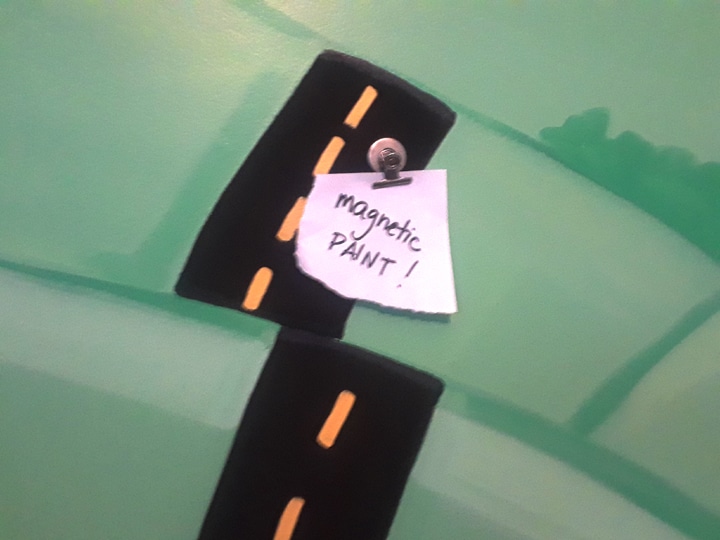
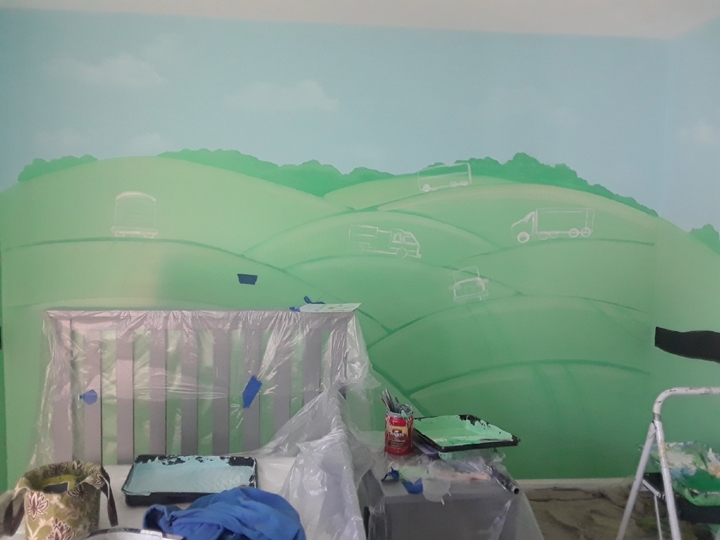
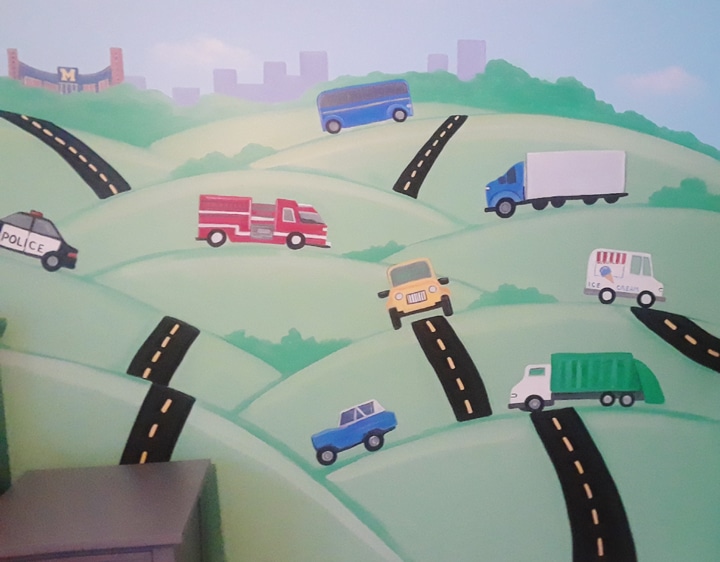
I recently had my first adventure in using magnetic paint. My client had the idea to use it somewhere in her son’s room. Seeing as we were going for a scene with cars and trucks, using this paint to create the ‘road’ seemed like a fun and creative way to incorporate this concept.
I used Rustoleum’s version of this paint. It’s actually an oil-based primer, but the instructions said you can paint over-top of it. The container also said it was a dark charcoal color. I envisioned that to mean a dark gray- but in essence, it was more like the literal charcoal you barbecue with- so jet black! Thankfully, it turned out to be the perfect color for creating the highway system we designed.
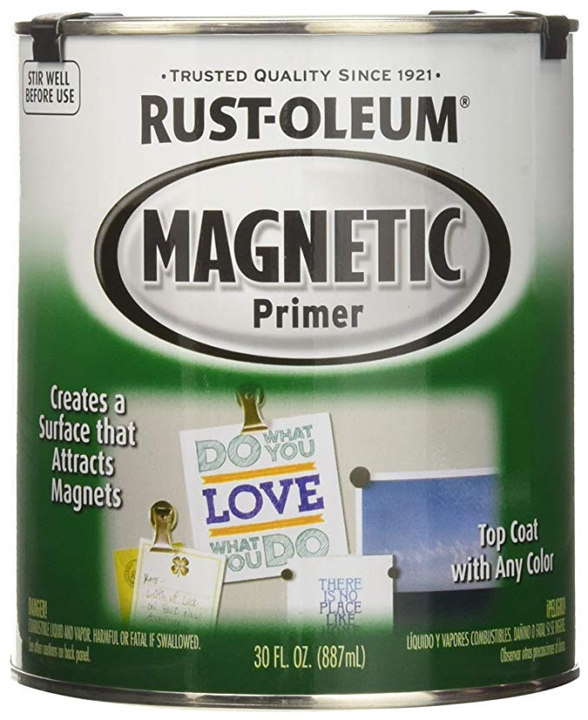
https://www.amazon.com/Rust-Oleum-247596-Magnetic-Primer-30/dp/B003ZW7XL4/
A few other fun facts I learned in my first experiment with this stuff-
As would be implied from an oil-based primer, this stuff REAKED! I painted with both windows wide open to dissipate the fumes.
Secondly, despite painting on a smooth wall and using a smooth, foam roller, the final texture was gritty. As first, like suede when it was fresh, but after a few days of fully drying, it feels like sandpaper. This made for painting any detail work overtop of it a little difficult. However, aside from painting the yellow dashed lines of the highway, there wasn’t much painting overtop.
The instructions recommended at least 3 layers of the primer to build the magnetic quality. I definitely did 3 and at times 4 layers. And in the end, the magnets stuck! I envision the fun it will be to make cars and trucks out of paper and magnets and to be constantly changing up the mural in the room with these embellishments, or tacking on love notes or reminders. How fun!